Search Knowledge Base by Keyword
Getting Started
This article will cover how to use the Append Mode with EdgeWise piping. There are some circumstances where point cloud data may not be good enough for extraction, or a complicated S-curve may exist in the project. In these scenarios a common workaround is to use the Append Mode option.
Append Mode
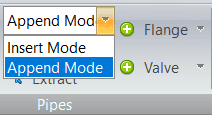
By default, when performing connections with piping, EdgeWise will be in Insert Mode. This means EdgeWise will require a user to click two endpoints between pipes to insert a straight connection, elbow, reducer, or tee. Append Mode, however, allows a user to add on connections to the end of a pipe part instead of inserting between pipe parts.
To activate this connection mode, simply change the drop down menu in the piping tab from Insert Mode to Append Mode.
Now when you select an item in the connector drop down menu, you’ll see it’s a little bit different from insert mode.
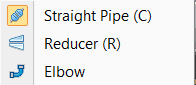
Notice Tee-connections are not available while in this mode. However, you can now append a straight pipe, reducer, or elbow, on to the end of pipe parts.
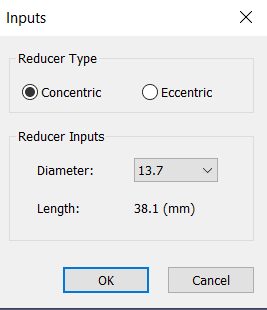
Keep in mind, appending a reducer requires that you apply a standard to the pipe you are appending off of. Next, the Reducer Input dialogue box will appear. In this dialogue box, select whether the reducer is Concentric or Eccentric. Additionally, you must use the Diameter drop down to determine the diameter of the other end of the reducer when placed. You may need to Rotate your reducer into its proper fit with the point cloud after placement.
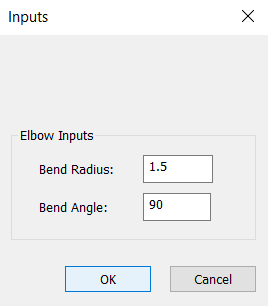
When you append an elbow, the Elbow Input dialogue box will appear. Here you must determine the Bend Radius and Bend Angle of the elbow. You cannot edit these values after placement so you may need to make multiple attempts to fit to the point cloud. After placement, you may need to Rotate your elbow into its proper fit with the point cloud.