Search Knowledge Base by Keyword
Getting Started
This article will cover the Automatic Pipe Extraction workflow for both structured and unstructured data. The Piping module in EdgeWise offers an algorithm that performs pipe extraction while processing your scan file(s), automating much of the front end of typical pipe modeling workflows.
The EdgeWise Piping workflow is designed to start with full automation, then move on to semi-automated extraction and QA. Please note, however, that some projects may have a smaller scope or focus that do not call for full automation, as it may result in lengthier QA than starting with a blank model. In these cases, you may start with Semi-Automated Extraction instead of starting with full automation. Skip straight to the linked article if these cases apply to your project.
Process Scans
The first step in Automatic Pipe Extraction is processing your scan data or pre-existing .c3DB point database file. To process your scan(s), click the Process Scans button located under the file tab in EdgeWise.

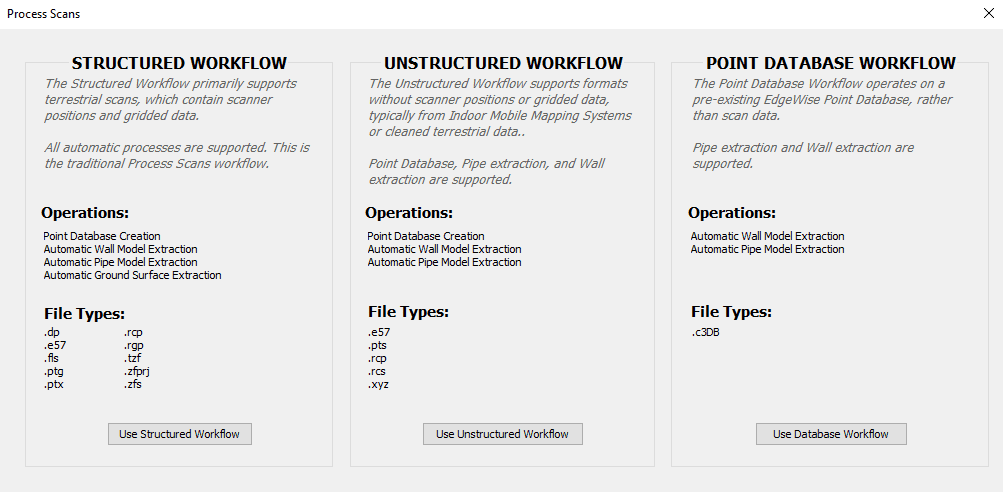
A Process Scans dialogue box will appear, allowing you to choose your workflow depending on your scan data format. Automatic Pipe Extraction can be used with any of the Structured Workflow, Unstructured Workflow or Point Database Workflow options. The process is similar for all workflows, but will display slightly different messaging in certain steps. Additionally, Structured data will result in slightly more complete extractions than Unstructured data.
Structured Workflow
Process Scans Options
If your project uses Structured data, select the Use Structured Workflow button, select your scan file(s) from the File Explorer window that appears, and click the Open button. From there, the Process Scans Options dialogue box will appear. Here you can set your preferences for the operations you want EdgeWise to perform on your scans, including Piping.
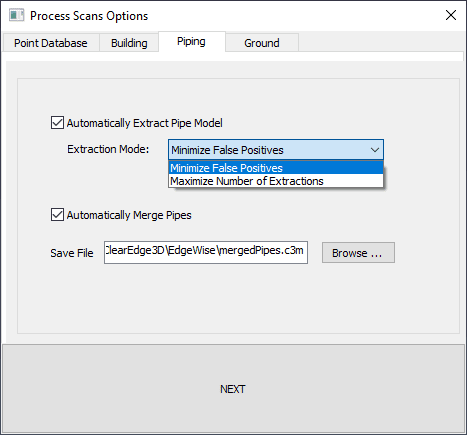
- Extraction Mode:
- Minimize False Positives: the default setting which extracts as many accurate pipes as possible but may ignore pipes it is uncertain of. This setting’s caution makes it ideal for clean scan data.
- Maximize Number of Extractions: will extract as many pipes as possible. Because this mode is less cautious than its counterpart, it may introduce additional false positives.
- Automatically Merge Pipes*:
- Automatically merge the extracted .c3pipes files and load the model into the scene. We recommend leaving this box checked.
- .c3pipes files, on their own, cannot be loaded into EdgeWise; their merged counterpart- .c3m files- can. It is best to let the algorithm do this up front.
- Automatically merge the extracted .c3pipes files and load the model into the scene. We recommend leaving this box checked.
*Automatically Merge Pipes is available only in the Structured Workflow. Unstructured and Point Database Workflows will automatically produce .c3m files
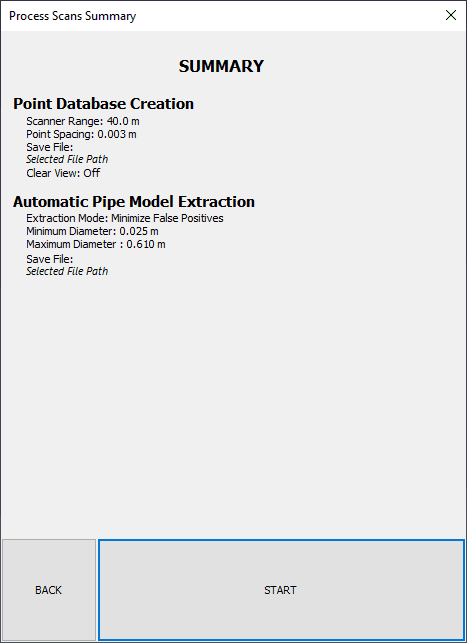
Process Scans Summary
Once your settings are adjusted to your liking, click Next, review the Process Scans Summary dialogue box to double-check your settings, and click Start.
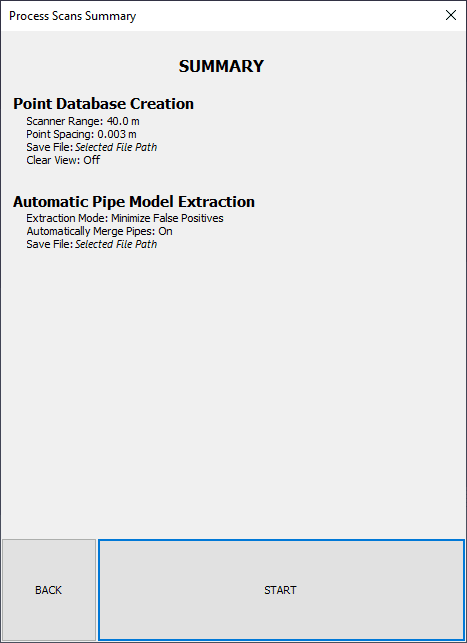
EdgeWise will begin to process the data and will produce your Point Database (.c3DB) and Pipe Model when finished.
Once EdgeWise has finished producing your pipe model, you can proceed to the Piping QA Process
Unstructured Workflow
Process Scans Options
If your project uses Unstructured data, select the Use Unstructured Workflow button, select your scan file(s) from the File Explorer window that appears, and click the Open button. From here, the Process Scans Options dialogue box will appear. Here you can set your preferences for the operations available in the Unstructured Workflow, including Piping.
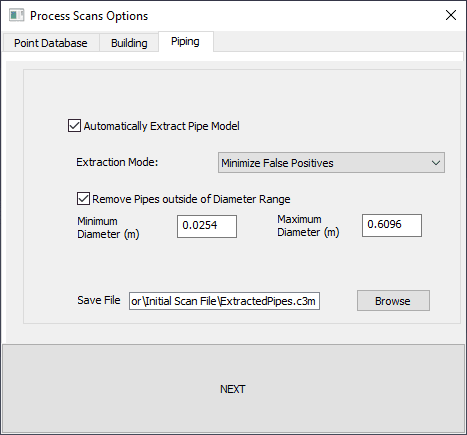
- Extraction Mode:
- Minimize False Positives: the default setting which extracts as many accurate pipes as possible but may ignore pipes it is uncertain of. This setting’s caution makes it ideal for clean scan data.
- Maximize Number of Extractions: will extract as many pipes as possible. Because this mode is less cautious than its counterpart, it may introduce additional false positives.
- Diameter Range*:
- Set the Minimum and Maximum Diameter range of pipes you want to extract for your project, and leave the Remove Pipes outside of Diameter Range option checked to ignore extractions of pipes larger or smaller than your presets.
*Remove Pipes outside of Diameter Range is available in the Unstructured and Point Database Workflows
Process Scans Summary
Once your settings are adjusted to your liking, click Next, review the Process Scans Summary dialogue box to double-check your settings, and click Start.
EdgeWise will begin to process the data and will produce your Point Database (.c3DB) and Pipe Model (.c3m) when finished.
Once EdgeWise has finished producing your pipe model, you can proceed to the Piping QA Process
Point Database Workflow
The Point Database Workflow does not differ from the Unstructured Workflow, with the exception of uploading an existing .c3DB file after selecting the Point Database Workflow as opposed to creating a new point cloud from scan data.