Search Knowledge Base by Keyword
Getting Started
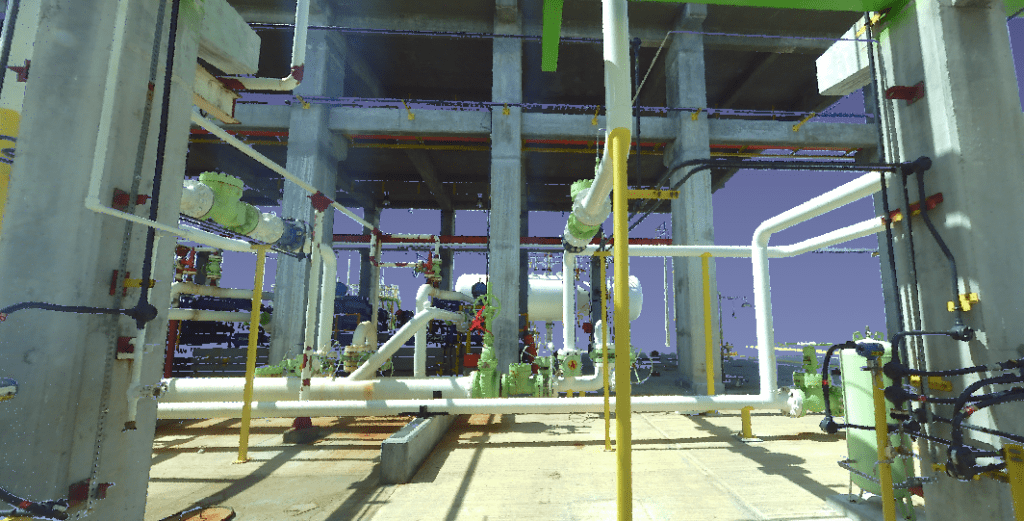
This article will cover ClearView Mode within EdgeWise. ClearView Mode allows the user to create a photo-realistic rendering of the point cloud. This rendering will be visible from within the first person view of individual scanners. Keep in mind, this option is only available in the Structured Workflow for process scans.
ClearView
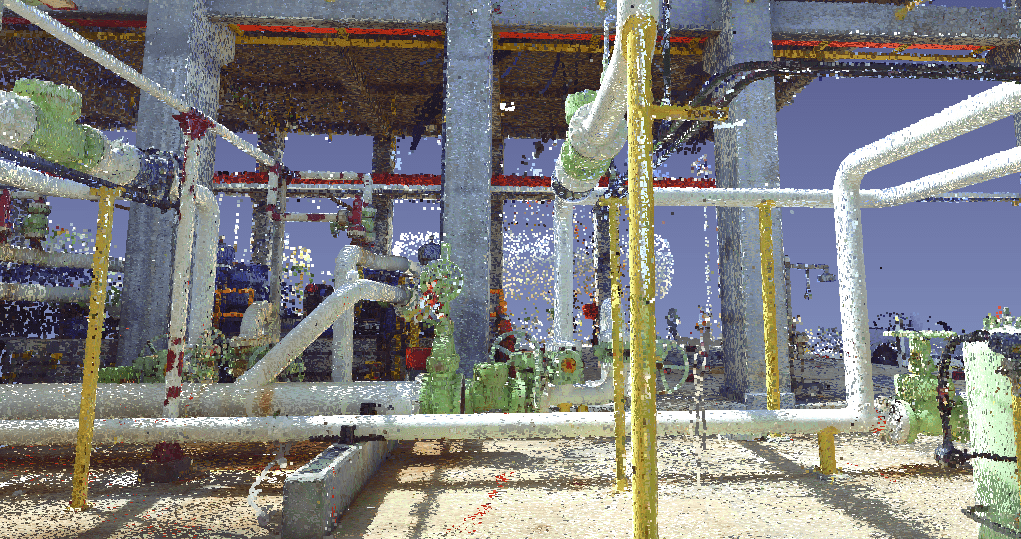
The ClearView capability enables you to view your scene from the perspective of any specific scanner location. This viewing capability allows you to get a more picture-like view of the point cloud data – allowing you to view your project as if you were standing inside the 3D scene itself at the exact location of a scanner. You also have the ability to fully model from this view!
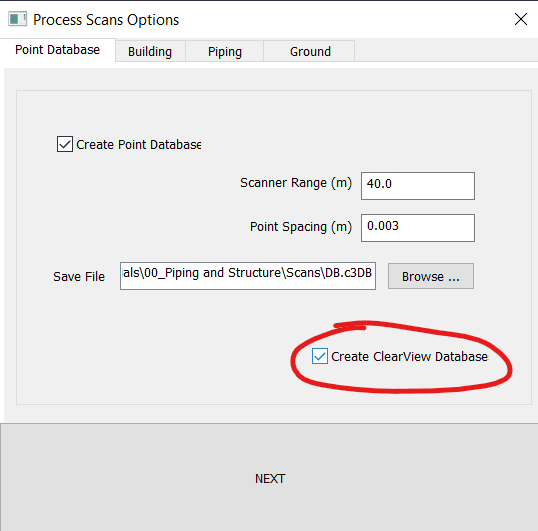
To enable this option, you must select the Create ClearView Databases checkbox when initially processing scans and creating point cloud databases.
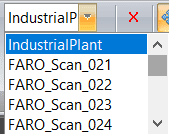
To view your scene in this mode, simply select a specific scan from the scanner drop-down list found in the View tab.
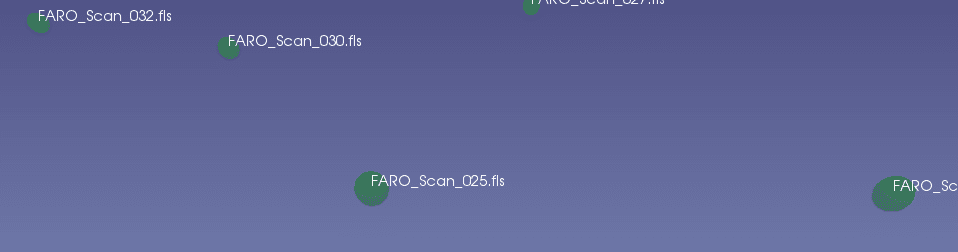
Alternatively, you can turn on the Scanner Location checkbox for the active model in the Model Selection Pane. Next, double-click one of the green spheres that represent each of the scanner locations within the scene.
In either case, the ClearView Mode checkbox will then appear checked in the Navigation toolbar.
While in ClearView Mode, you can navigate to various scanner locations either by using the scanner drop down list or by double-clicking on the green spheres within your scene. Using either of these options, the scene will automatically zoom to the location of the selected scanner.
Note: If you click on a green sphere in order to zoom to a particular scanner location, your scene will turn green; this occurs because you are viewing the scene at the exact location of the selected scanner. The green coloring will disappear as you navigate around the scene in ClearView Mode. It is also sometimes necessary to triple- or quadruple-click on a scanner sphere in order to capture the exact scanner location and zoom to that location within the scene.
Exiting ClearView Mode
To exit the ClearView Mode and to return to normal navigation, perform one of the following actions:
- Use the focus (f) key—see Navigation.
- Uncheck the ClearView Mode checkbox in the View tab.
- Choose the top entry in the scanner list drop down menu. This entry should be the same name as the .c3db file you loaded, in the scanner selection list.
- Press the Zoom Extents, or, Zoom Model buttons in the View tab.