Search Knowledge Base by Keyword
Getting Started
This article will cover how to efficiently utilize layers in your piping projects. Layer information is helpful in assigning a variety of information to your pipes before export. While this information doesn’t carry with every export option (ie STEP, centerlines, etc.) It can be very helpful with export formats like Revit, AutoCAD, etc. Knowing how to utilize layers will also be extremely helpful in performing certain actions in EdgeWise.
Accessing Layer Information
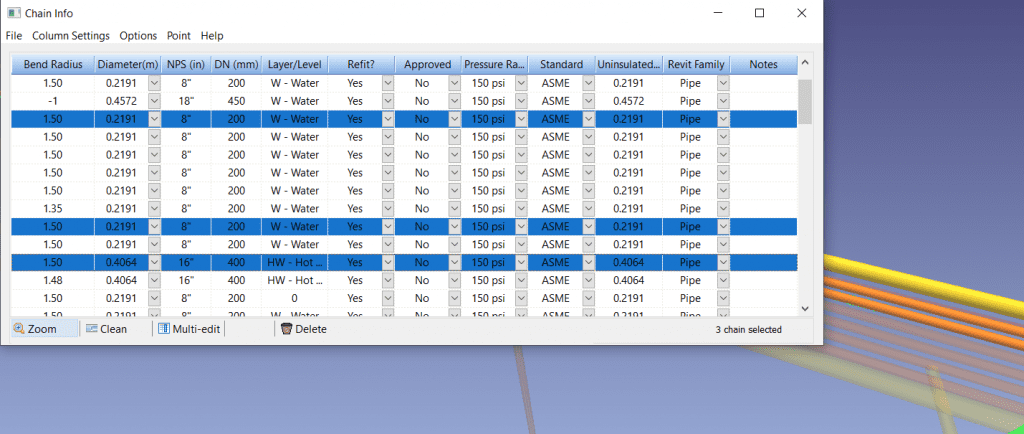
To view layer information for your pipe model, first navigate to the Piping tab in the ribbon. Next, click on the Smartsheet drop down and click Chain Info Smartsheet. Alternatively, you can click the I key on your keyboard. You should notice a column in this smartsheet labeled Layer/Level.

By default every chain in your project will have 0 in this column. However, you can type freely in this text box with any information you like. Alternatively, you can create your own custom layer group and assign layers via drop down menu. For information, view this article here.
How to Utilize Layer Information Effectively
It’s understandable how layer information can be helpful after exporting. For example, once you import all of your pipes into Revit, you can select all in instance your W-Water pipes and swap them with your proper family object. View this article for more information on this workflow. But how can layer information speed up your workflow in EdgeWise?
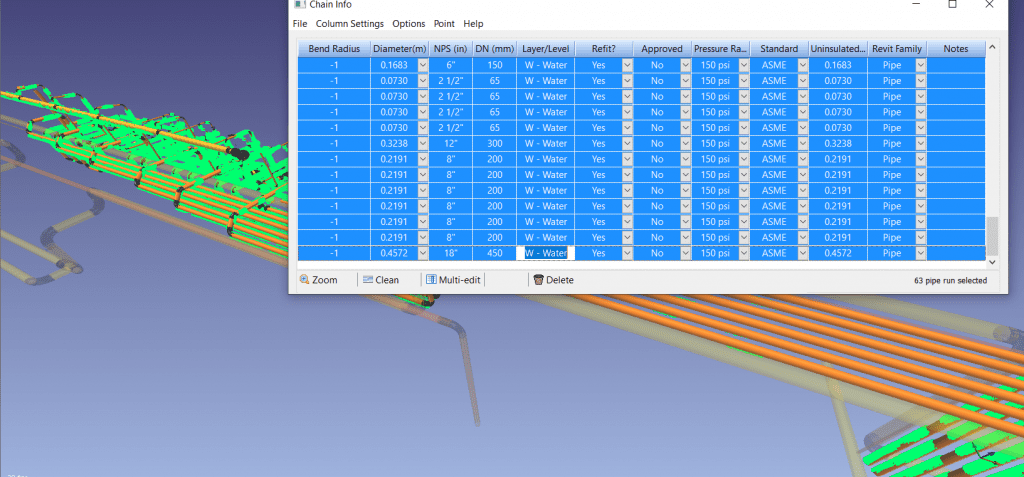
One of the biggest reasons to utilize layer information, is to help more effectively use the multi-edit tool. This button can be found in the bottom of the chain info smartsheet, and allows you to edit information for multiple pipe chains.

To utilize the multi-edit tool, you’ll need to make selections of pipes you wish to adjust. This can be information like standards, pressure ratings, Revit Family Type, and so on. If you were to perform your workflow in stages (ie clean, then apply standard, then adjust pressure rating, then adjust revit family type) you would need to re-select these pipes in the 3D view every time. This can be very time consuming.
Alternatively, if your pipe chains have layer information already assigned, selection becomes so much easier. Click the Layer/Level column at the top of the chain info smartsheet to sort everything in the table via Layer name. Now you can shift-select everything in that layer and easily clean or multi-edit.