Search Knowledge Base by Keyword
Getting Started
This article will cover the steps necessary to insert valves and flanges into your project. Ensure you standardize your pipe chains before inserting valves and flanges. After exporting, swap your valves and flanges to the proper catalog item in your deliverable. Custom standards will not export over to certain deliverables. If you are exporting with the Plant3D, PCF, or PDMS formats, some of your custom items WILL NOT export to your deliverable. For these formats, you must use ASME or DIN default specs within EdgeWise. Additionally, we do not support custom valves or flanges for these export options.
If you are exporting to Plant3D it is highly recommended that you insert Valves and Flanges INSIDE of Plant3D, not inside of EdgeWise. This helps avoid custom standard issues and will make it easier to get your proper geometry placed correctly. This is made easier by taking use of the Smart Points export option.
Workflow
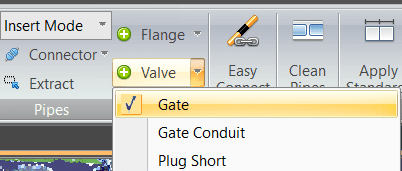
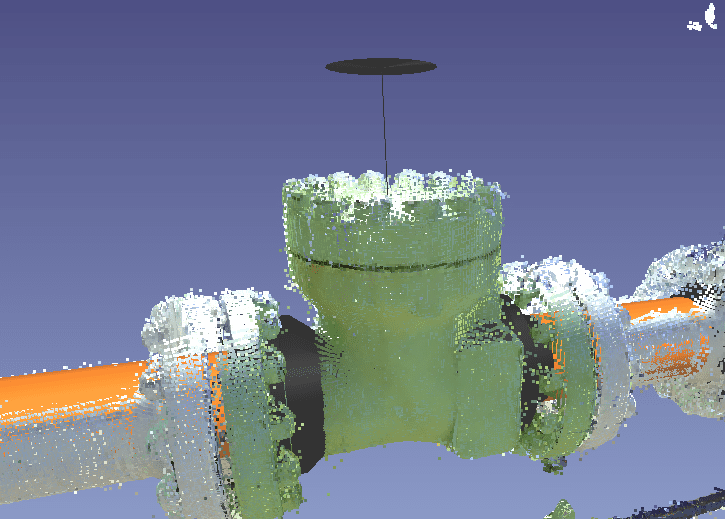
To insert a valve or flange, use the drop down menus available in the Piping tab, located to the right of the Connector drop down. Choose your preferred item type and place it anywhere on a pipe by left-clicking.
Use the Slide (S) tool to dial in the final placement. Additionally, you can use the Rotate (W) tool to rotate the hand wheel on Valves to their proper position.
Finally, swap out your valves or flanges within your deliverable. Select all of an item in your deliverable and swap with the proper catalog item.
Refer to this article for information regarding custom standards.